I’ve always loved the look of aged terra cotta. You’ll find it scattered throughout my home both indoors and out almost year-round. The rich texture and earthy tones bring so much character to any space. When Pottery Barn released their terra cotta pumpkins a few years ago, I instantly fell in love. They were completely my vibe, but unfortunately not within my budget. That led me down the path of creating my own diy terracotta pumpkins using inexpensive seasonal finds and a simple faux terra cotta paint technique that has become one of my favorites.
Over time, I’ve tried many different methods that involved baking soda or flour to get that chalky texture. While those work, they tend to be messy, hard to store, and not always practical if you’re painting multiple pieces. The painting technique I’m sharing today is a streamlined version that uses only paint. It gives the same beautiful matte finish and aged terra cotta look, without the mess of excess flour or complicated paint recipes.
This year, I wanted a unique pumpkin centerpiece for my dining table. None of the store-bought pumpkins matched my color scheme or plans for the tablescape, so I decided to create my own terra cotta pumpkin vase. The result was even better than I imagined—an elegant faux pumpkin transformed into a timeless vase that feels like a pottery barn terracotta pumpkin dupe.
If you’re ready to make your own version, let’s walk through this easy DIY project.
Please note: This post contains affiliate links. If you make a purchase via one of these links I may receive a small commission from your purchase. This commission does not add any cost to you but helps me to continue to share new products and ideas with you. Thank y’all for always being so supportive!!
Shop the Post


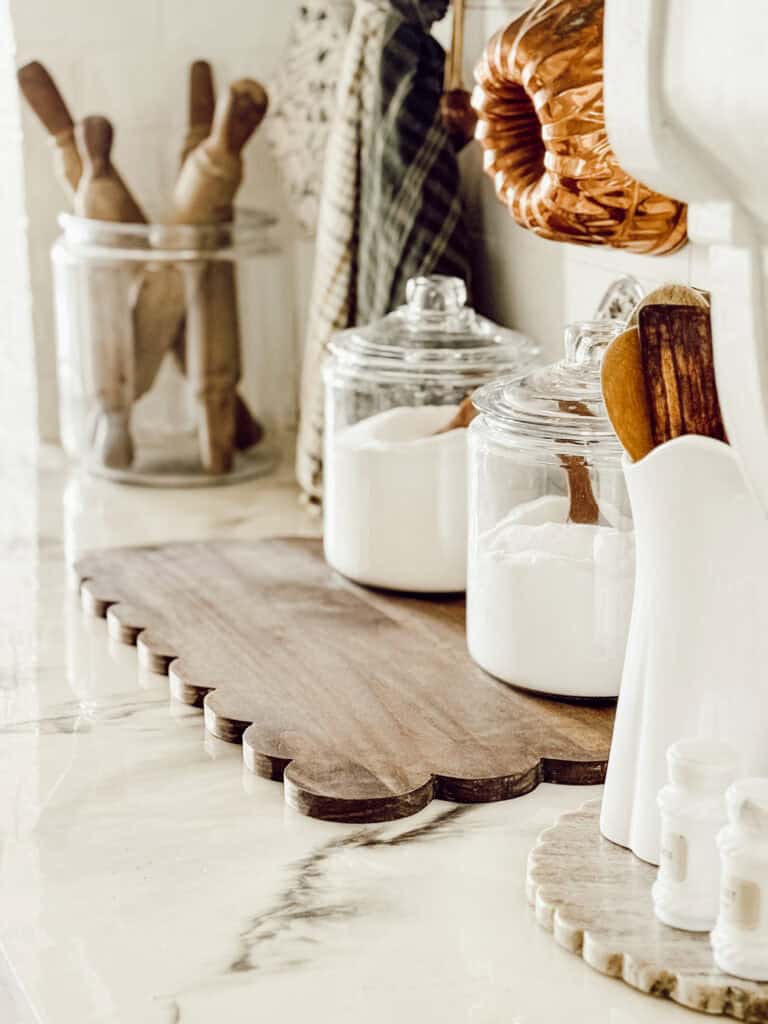
Supplies
To create your own diy terra cotta pumpkin centerpiece, gather the following items. Most of these are easy to find at hobby stores like Hobby Lobby, your local craft aisle, or even your seasonal stash from last year.
- Faux pumpkins (for a vase, choose faux carvable pumpkins with a hollow center)
- Pueblo acrylic paint
- Vintage white acrylic paint
- Paint brushes (chip brushes work perfectly)
- Paper plates for mixing paint colors
- Wax paper to protect your work area
- Paper towels
- Water
- Gloves to keep hands clean
Optional: A glass jar or small vase to fit inside your pumpkin if you’re creating a vase centerpiece.
Subscribe to get all the latest projects delivered Right to youR Inbox!
Step-By-Step Instructions for Terra Cotta Pumpkins
This step-by-step tutorial will walk you through creating your faux terra cotta pumpkins. Whether you’re painting small pumpkins, larger pumpkins, or even plastic jack-o-lanterns, this technique works on any type of pumpkin.
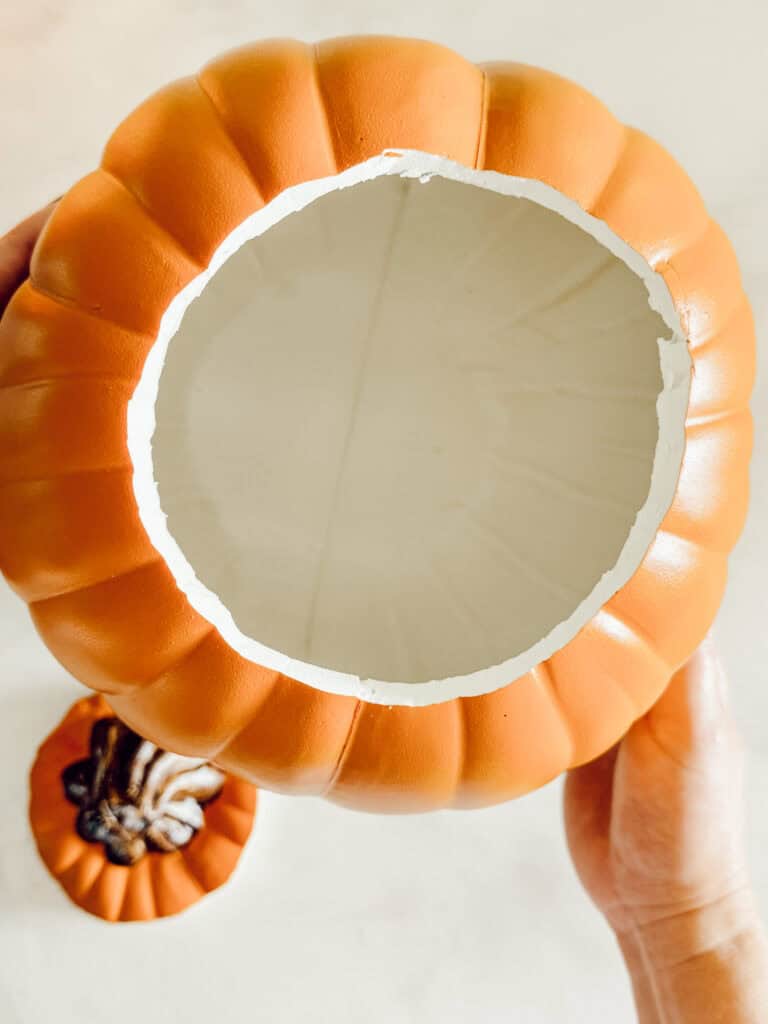
Step 1: Prep your pumpkin
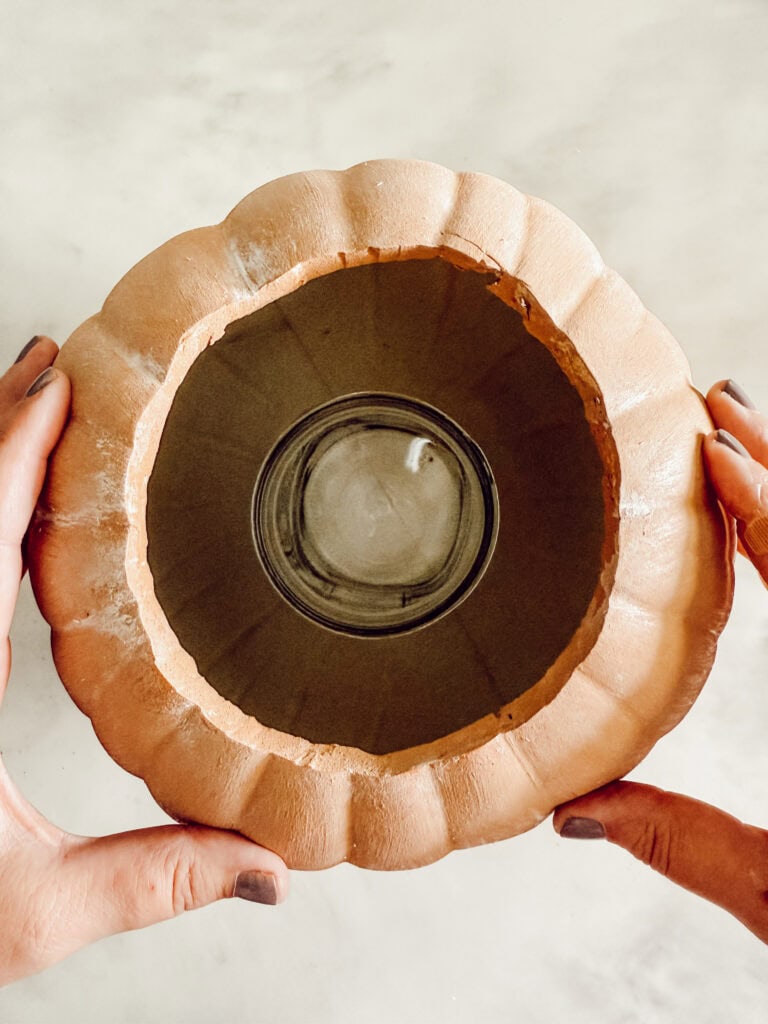
If you’re making a vase, the first thing you’ll want to do is cut the top center out of your faux carvable pumpkin. Save the stem for later. If you’re painting smaller pumpkins for decor, you can skip this step.


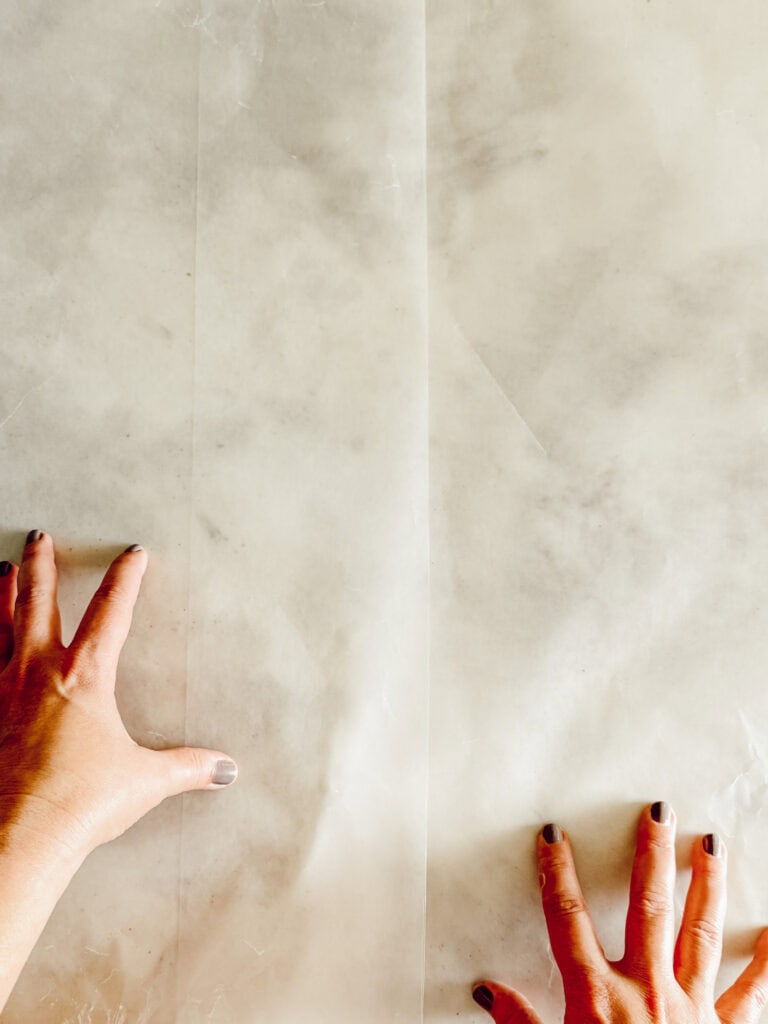
Step 2: Set up your work area
Lay down a drop cloth, wax paper, or even use a cardboard box to protect your space. A clean work surface will make the entire project easier.
Step 3: Apply the first coat
Using a paint brush, cover the entire pumpkin with Pueblo acrylic paint. Be sure to get into the grooves and creases. This first coat will establish the perfect terracotta color base. Let it dry thoroughly before moving to the next step.
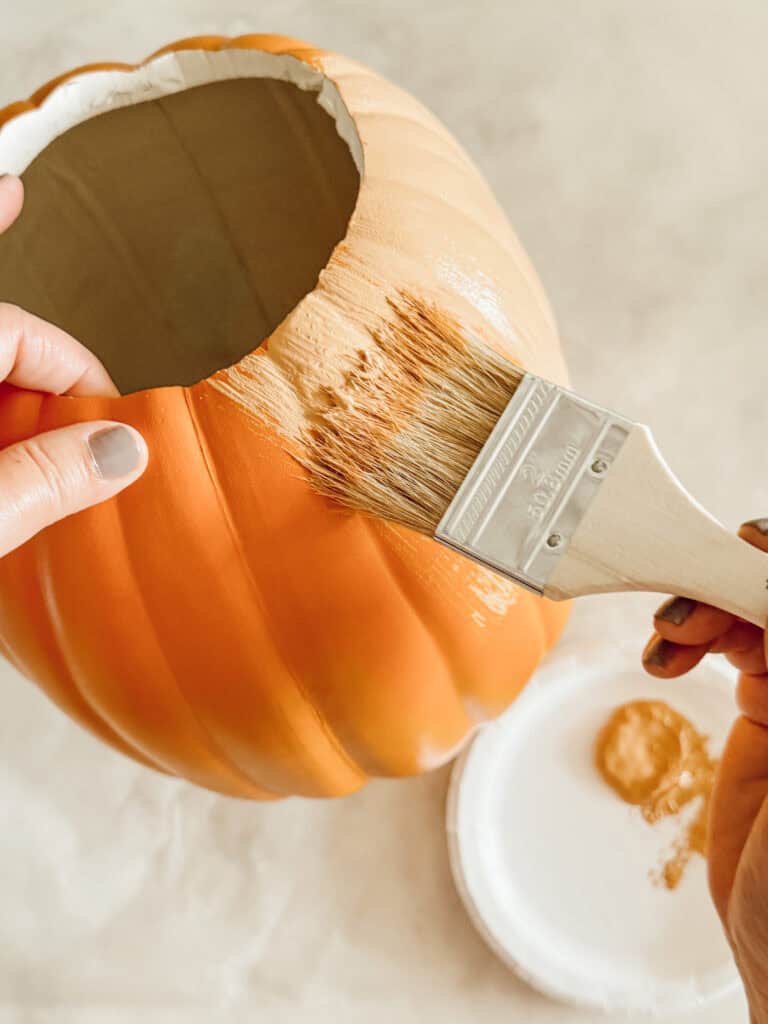


Step 4: Add depth with white paint
Once the first coat is dry, dip your brush into a little white paint. Apply a thin, uneven layer across the pumpkin surface. Work in vertical strokes so it mimics the natural texture of real terra cotta.


Step 5: Blend for a natural finish
Before this second coat sets, take a damp paper towel and gently wipe across the surface. Leave the lighter color paint in the grooves and wipe away from the raised areas. This creates visual interest and gives the entire pumpkin a matte finish with that authentic aged look. Allow it to air dry completely.


Step 6: Transform into a vase
If you’re creating a centerpiece, slip a small glass jar or vase inside the hollow pumpkin. Add water, then fill with flowers. I love adding hydrangeas from my garden. They naturally dry in place, which makes them the perfect finishing touch for the fall season.

That’s it—an adorable pumpkin centerpiece with all the charm of pottery barn versions at a fraction of the cost.

Tips for the Perfect Terra Cotta Pumpkins
- If you want a darker color, layer a second coat of Pueblo before adding the lighter paint.
- For a softer pumpkin look, dry brush with just a little white paint instead of wiping with paper towels.
- Different sizes of craft pumpkin create dimension when styled together. Grouping larger pumpkins with small pumpkins makes the best look for a front porch or dining table.
- If you’re repurposing plastic pumpkins or ceramic pumpkins from last year, give them a quick sanding block pass before painting. This helps the paint stick to the entire surface.
- Don’t be afraid to try different ways of layering colors. Adding a little darker paint or a lighter color variation can help you achieve your perfect color scheme.
- This technique also works beautifully on foam pumpkin stems, giving them a natural pottery barn pumpkin vibe.
- Use a matte finish sealer if you plan to keep your diy pottery barn pumpkin outdoors on the porch for the fall season.

Frequently Asked Questions
What kind of pumpkin works best for this project?
Faux pumpkins are ideal, especially foam or craft pumpkin varieties. Plastic pumpkins and plastic jack-o-lanterns also work well with this painting technique.
Can I use real pumpkins?
Yes, but real pumpkins won’t last the entire season. For long-lasting décor that can be reused year after year, faux pumpkins are the best part of this project.
Do I have to cut the top if I’m not making a vase?
No. If you just want painted pumpkin décor, leave the stem in place. Cutting is only needed for vase projects.
What paint colors should I use?
I love Pueblo for the base and Vintage White for the lighter color. Together they create the perfect terra cotta look. You can adjust with darker color shades or add a little white paint to lighten the effect.
Will this work on ceramic pumpkins or store-bought pumpkins?
Yes. This diy terra cotta pumpkin technique works on ceramic, foam, or plastic. It’s a great way to refresh décor you already own.
How long does the paint take to dry?
The first coat usually dries in about 30 minutes depending on your work area conditions. Make sure it’s completely dry before applying the second coat.
Do I need to seal the pumpkin?
If the pumpkin will stay indoors, sealing isn’t necessary. For outdoor or front porch displays, a matte finish spray sealer will help protect it.

Creating your own diy terra cotta pumpkin is such a fun fall craft and a great way to add timeless pottery barn style without the price tag. From small pumpkins styled on a mantel to larger pumpkins as dining table centerpieces, there are endless different ways to use this technique. The best part is how easy it is—you only need a few paint colors and simple steps to get the perfect terra cotta look.
So whether you’re painting a foam pumpkin, refreshing last year’s adorable pumpkins, or making your own diy pottery barn pumpkin vase, this easy diy project will be one you reach for every fall season.
Happy crafting, friends! If you try this diy terra cotta pumpkin painting technique, I’d love to see your own version. Follow along on social media @returninggrace and be sure to tag me or leave a comment with your project.