

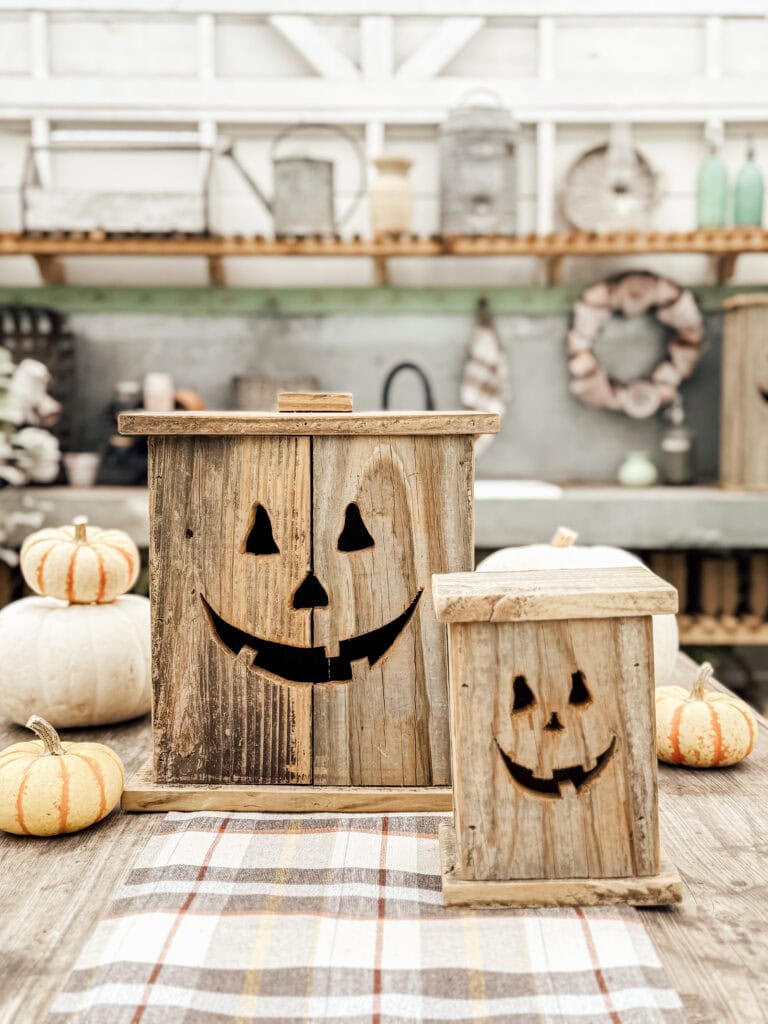
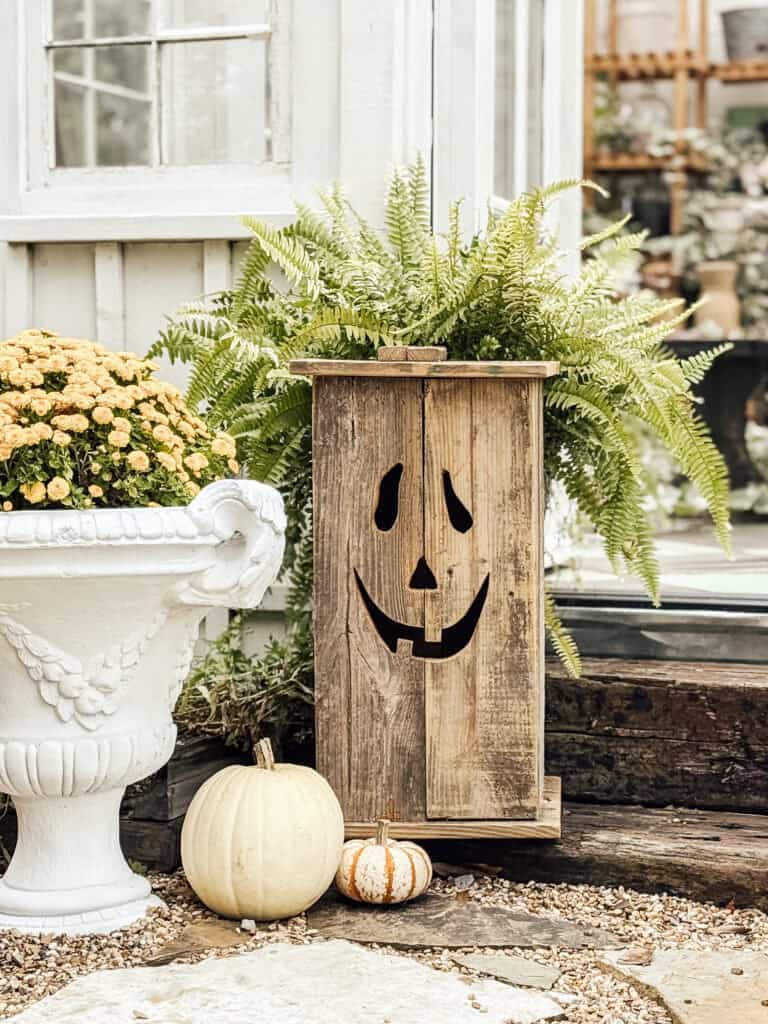
If you’re searching for a unique Halloween decoration that combines rustic charm with spooky décor, these DIY Wood Jack-O-Lanterns are the perfect project. Instead of the usual plastic pumpkins, you can craft a lantern from a cedar fence plank and customize it with your favorite pumpkin face design. With a few tools, some grit sandpaper, and a little creativity, you’ll have a finished product that lights up your porch and shows off the beauty of wood grain while adding festive warmth to your fall season.
want to BUY the lanterns instead of making them?
I’ve teamed up with my friend Jennifer from Birch Lane by Jennifer to bring you a BUY option! I know time and tools can be a problem sometimes soy can purchase her adorable, high quality lanterns made of cedar!

Supplies for DIY Wood Jack-O-Lanterns
For a small lantern measuring approximately 8”H x 5 1/2”W x 6”D, you will need these supplies:
- (1) 5/8” x 5 1/2” x 6 ft cedar fence plank (a reclaimed plank adds extra character)
- Chop saw
- Jig saw
- Table saw
- Brad nailer with brad nails (or hammer and finishing nails)
- Wood glue
- Printed jack-o-lantern face pattern or freehand drawing
- Drill and 3/8” drill bit for pilot hole
- Orbital sander and fine to medium grit sandpaper
- Battery-operated tea light or touch light (no traditional candles for safety!)
- Optional: branch or wooden stem for the top of the box
Dimensions can easily be scaled up for medium and large lanterns.
Shop for supplies

Please Note
These plans are for personal use only and not for commercial use. Thank you!
Looking for the lantern face patterns?
Click below to subscribe and have instant access!

Step-By-Step Instructions for DIY Wood Jack-O-Lanterns


Tips for the Perfect DIY Wood Jack-O-Lanterns
- Always drill a pilot hole before using a jig saw to cut out detailed designs.
- For extra stability, add clamps while the wood glue dries.
- A quick coat of orange, black, or white paint can give your lanterns a different personality, but leaving them natural shows off the rustic wood grain.
- If making multiple lanterns, cut all pieces of wood for each size at once to save time.
- Remember: since this project uses wood, only battery-operated lights should be used.
Meet Stephanie
Hi, I’m Stephanie—a lifelong creative, homebody at heart, and the hands behind Returning Grace. I believe home should feel like your favorite place, and I’m passionate about helping you create spaces filled with warmth, character, and charm. From simple DIYs and seasonal crafts to cozy recipes and vintage-inspired decor, I share approachable ideas to make your home feel beautifully lived in. I love thrifting, styling old finds in fresh ways, and documenting our home remodeling adventures along the way.
I’m honored to have served as the 2024 American Farmhouse Style Brand Ambassador and to share my love for cottage farmhouse living with a community that values creativity, comfort, and meaningful design.

Frequently Asked Questions
What type of wood should I use?
Cedar fence planks are ideal because they’re durable and easy to cut. Reclaimed wood also works well and adds rustic character.
Can I change the size of the lanterns?
Yes. The use of the plans allows you to adjust the dimensions. Just remember to scale all pieces consistently.
Do I need a brad nailer?
A brad nailer speeds up the process, but you can also use a hammer with finishing nails if that’s what you have.
How do I make sure the lanterns last outdoors?
Apply a clear outdoor wood sealant if you plan to leave them outside through the season.
What kind of light works best inside?
Battery-operated tea lights, puck lights, or LED fairy lights all work beautifully to bring your lantern to life.

Creating your own DIY Wood Jack-O-Lanterns is a rewarding project that adds warmth and charm to your Halloween decorations. Whether you use a simple pumpkin face or get creative with different jack-o-lantern face patterns, the end result is a handmade Halloween decoration you’ll enjoy for years. I truly look forward to taking these out of storage every year and seeing their adorable faces!
I’d love to see your finished product! Follow along on social media @returninggrace, and be sure to tag me or leave a comment if you try this project. Happy crafting and happy Halloween!

Pin for Later


