I love decorating with wreaths all year long, and one of my favorite spots to style them is on my quilt ladder. It’s such a simple way to add a charming focal point to the piano wall in my living room. With spring quickly turning into summer, I decided it was time to transition from a seasonal look to something more neutral—something that could carry through multiple seasons with just a quick ribbon swap. That’s where this pretty and practical DIY comes in: a wood flower wreath using neutral-toned sola wood flowers.

These soft ivory flowers have such lovely texture and bring a romantic, handcrafted feel to any space. I’ve used similar flowers before when I made my book page flower wreath, and I received so many messages asking where to buy the flowers pre-made. While I don’t currently have a source for premade book page flowers, I do have a great source for sola wood flowers, and this DIY option is perfect for anyone looking for a creative and timeless project.

Whether you’re looking to add something unique to your wall décor, create a beautiful wedding accessory, or simply enjoy a fun afternoon of crafting, this wood flower wreath is an easy project that you’ll love displaying all year long.
Let’s get started!
Please note: This post contains affiliate links. If you make a purchase via one of these links I may receive a small commission from your purchase. This commission does not add any cost to you but helps me to continue to share new products and ideas with you. Thank y’all for always being so supportive!!
Supplies
- Sola wood flowers (in varying sizes and neutral tones)
- 18” straw wreath form (I found mine at Hobby Lobby)
- Hot glue gun and glue sticks
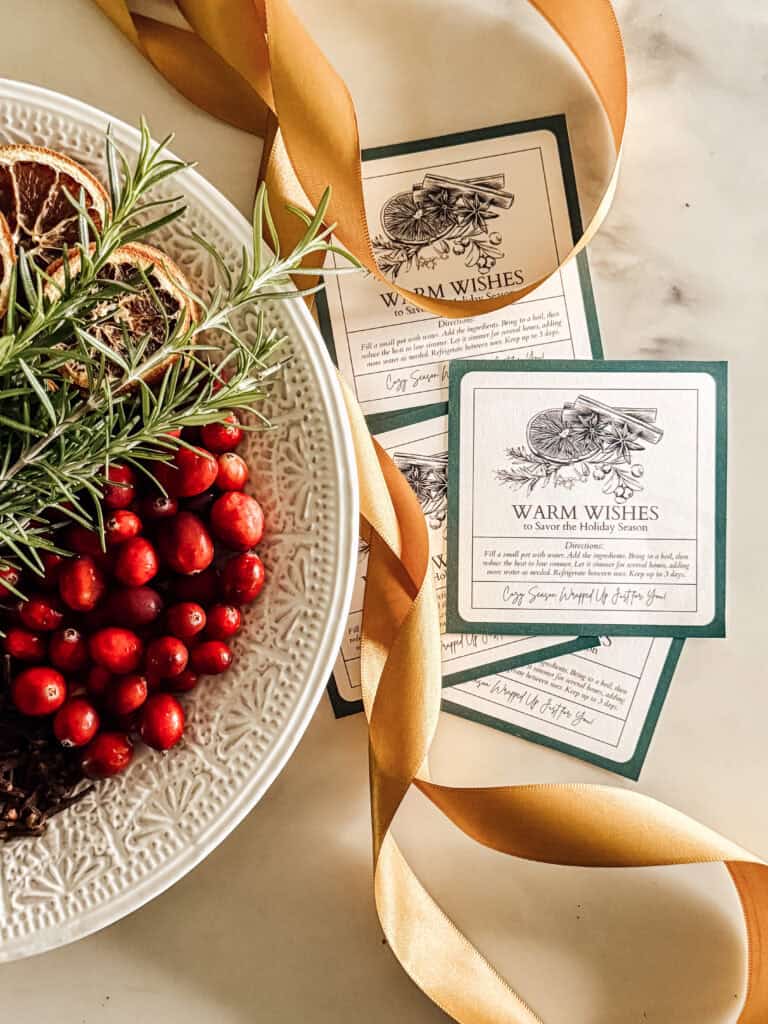
- Ribbon in a color scheme of your choice
If You’d like to shop all of the supplies you can find them here.
Step-By-Step Instructions
Step 1: Loop the ribbon around the top of your wreath
Begin by taking your chosen ribbon and looping it around the top section of your straw wreath form. This will not only help you determine the top of your wreath as you begin designing, but it will also provide a clean space to attach your final hanging ribbon. You can switch out the ribbon later for a different look each season—just another reason this wreath is so versatile.

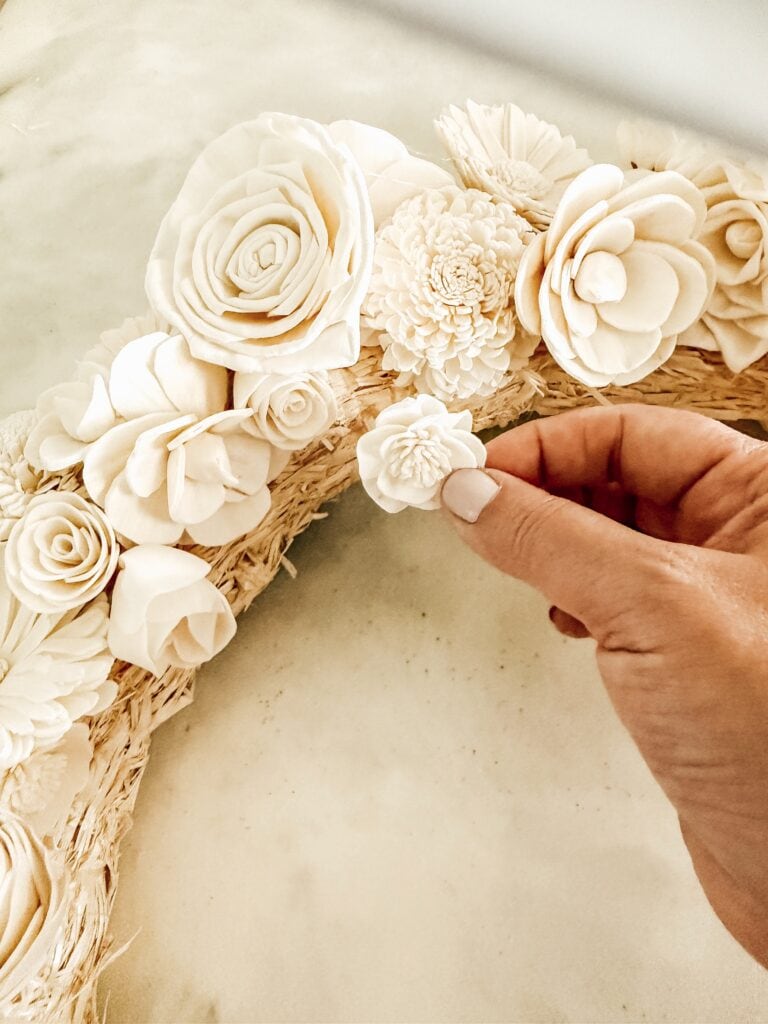
Step 2: Glue the flowers onto the straw wreath form
Using your hot glue gun, begin attaching the sola wood flowers to the straw wreath. Start with the largest flower first and space them out evenly around the form. Then, work in the medium-sized blooms and smaller flowers to fill in the gaps. I like to alternate the sizes as I go, which helps give the finished product more visual depth and texture. For this 18” wreath I use 1.5 bags of large flower and half of the mini flowers so I have more flowers left for crafting!


Step 3: Fill in any remaining spaces with smaller flowers
Once you’ve added your main flowers, take a moment to inspect the wreath for any sparse areas. Use your smaller flowers to fill in these spots, applying hot glue directly to the base of the flower and pressing firmly onto the wreath form. You’ll be amazed how just a few small additions can make a big difference in creating a full, lush look.


Step 4: Hang your wreath and enjoy!
Now that your wreath is complete, use your ribbon to hang it in your desired space. I chose to display mine on my blanket ladder in the living room, and I love how it softens the space with its neutral tones and handcrafted charm. I’ll likely keep it up through fall and simply swap out the ribbon to match each new season’s color scheme.


Tips
- Use a high-temperature glue gun when attaching the sola wood flowers to ensure they stay securely fastened to the wreath form, especially if you plan to hang your wreath in a warmer area.
- Mix different sizes and textures of sola wood flowers for the best visual impact. Try clustering a few smaller flowers together beside one of your largest flowers to add contrast and depth.
- Customize with color. While I used ivory tones for a timeless look, you could easily dye your wood flowers in different colors to match a particular theme or season. Just follow the dyeing instructions that typically come with sola wood flowers.
- Choose your ribbon with versatility in mind. Neutral tones like linen, burlap, or soft velvet work well across many seasons. Or go bold with seasonal patterns and textures if you like switching things up!
- Keep your wreath indoors or in a covered area to protect the delicate sola wood flowers from moisture or direct sun.
Frequently Asked Questions
Where can I buy sola wood flowers?
There are several online retailers that offer sola wood flowers in different colors and sizes. This was a great option with fast shipping. They’re also available in pre-dyed or themed assortments.
Can I use a foam wreath form instead of straw?
Yes! A foam wreath form is a great diy option if you prefer a smoother base. Just note that straw adds a bit of rustic charm and holds hot glue very well.
How many flowers will I need?
For an 18” wreath, you’ll want at least 30–40 flowers in varying sizes. Start with a mix of large and small flowers so you can fill the wreath evenly and avoid big gaps.
Can I dye the wood flowers myself?
Absolutely! Sola wood flowers can be dyed with a mixture of acrylic paint and water. This is a great way to create a custom color scheme for weddings, baby showers, or seasonal displays.
Is this wreath heavy?
Surprisingly, no! Even when completely filled with sola wood flowers, the finished product remains lightweight and easy to hang with just a loop of ribbon or a command hook.
Can I use this wreath for events like weddings or showers?
Yes, and it would be a stunning choice! These wreaths make beautiful ceremony backdrops, table centerpieces, or nursery wall hangings. Just change the ribbon and flower colors to suit the occasion.

This wood flower wreath was such a joy to make—and even more rewarding to hang up and admire! The soft neutral tones and beautiful textures of the sola wood flowers add the perfect touch of elegance and warmth to any space. Best of all, by simply swapping out the ribbon, this project becomes a year-round staple that can suit any season or celebration.
Whether you’re a seasoned crafter or just looking for a beautiful DIY option to elevate your home decor, this wreath is an easy and satisfying project. And if you’re anything like me, you’ll already be thinking about your next step—maybe creating a matching garland or centerpiece to go with it!
Happy crafting! Let me know if you try this project—I’d love to see your finished product and how you styled it in your home.